Technology

Geek Stuff

Early in the 1970’s there was an Atari arcade game called something like Tank Battle. One of my friends from work and I would play this game all the time. Finally we realized that it would be cheaper to build our own game than to keep feeding quarters into the bar machines. At about the same time integrated circuit technology was reaching the state where a home-brew computer was feasible. Magazines like BYTE and Dr Dobbs Journal of Computer Calisthenics’s and Orthodontia were loaded with software and hardware projects and ads from vendors selling components. Computer clubs were being formed all across the country.

Through connections at work I was able to get samples of the Intel 8080 microprocessor and the associated support chips. At the same time another friend of mine had acquired an old UNIVAC mainframe computer for just the cost of hauling it away. Once he had it, he found out that wiring his garage for the required 3-phase power would be prohibitively expensive. As a consequence he was selling off the machine for parts.

With this, the great “Home Computer” project started. Little did I know what I would have to learn and how long it would take to complete. I plugged away and by early 1977 I had built the computer shown below — and it actually worked!

The computer itself was comprised of around 20 hand-made circuit boards housed in a box built from aluminum angle and surplus aluminum sheet. The keyboard was salvaged from one of the keypunch machines from the old UNIVAC mainframe. The monitor was a surplus 9″ display bought from a mail order house. Eventually I built a case for the monitor and “prettied up” the whole rig.

This machine ended up with a whopping 15 kilobytes of RAM and 1 kilobyte of UV Erasable ROM and it operated at a screaming 2MHz clock rate! Two regular cassette tape recorders provided “mass storage” via something called the Kansas City Standard interface. Later this would be replaced with two 5-1/4″ Shugart floppy drives.

Eventually I wrote a symbolic assembler for the 8080 machine code, a simple text editor, a basic interpreter and several games (alas, not the Tank Game).

Here is a picture of the interior of the computer.

On the right is the power supply providing ±13V DC and ±19V DC unregulated . I believe the maximum current was 5 amps. On the center of the rear panel you can see the voltage regulators which converted this to ±12 and ±5 volts.

The left and center sections held the PC cards. These all used 44 pin edge connectors, salvaged again from the old UNIVAC mainframe. In this photo you can identify all of the PC cards or card slots (from front to back):

  • Slots (empty in this photo) for 7 RAM Cards (2kx8 each)
  • 1K ROM + 1K RAM Card
  • Memory Control Card
  • CPU Card #1
  • CPU Card #2
  • Status Latch Card
  • Keyboard Encoder
  • Video Interface Cards #1-4 (based on the TV Typewriter by Don Lancaster.)
  • The empty connector in the center bay is for the Cassette Interface card.

This was a fun and very educational project and one of the neatest technical things I have ever done. I spent hours wiring and debugging the unit and writing the software. I probably learned more about digital circuit and software design from this project than I ever did at school or on my day job. Another exciting thing was, for a short time, I was one of the very few people who could casually say, “Why yes, I have a computer in my basement.”

On our final day in Tucson we went to the Pima Air & Space Museum. This is a wonderful place to visit if you are an aviation fan. There are hundreds of aircraft on display plus you can take an optional trip to the famous 309th Aerospace Maintenance and Regeneration Group (AMARG)Boneyard

SR-71 BlackbirdOne of the first aircraft we saw was the impressive SR-71A Blackbird. It’s hard to imagine anything that can fly at 2200+ MPH but, standing next to it, you have to know this plane is Fast!

Fighter RowNext we went outside to see the exhibits there before it got too hot. Here is a picture of the area where fighter aircraft are on display. There were also areas for bombers, transports, tankers, seaplanes and other sorts of aircraft.

B-52Here is a B-52 Stratofortress Bomber first introduced in 1955 and still in active service today. Without actually being there, it is hard to imagine how big one of these is.

Not all of the aircraft are from the US military. Here is a North Korean Mig-15 (built in Poland) used extensively by the enemy in the Korean war.

JFK's Airforce 1Here is the incarnation of Air Force One that was used by president Kennedy, a VC-118A Liftmaster (Douglas DC-6). This was the only plane where visitors were allowed to tour the interior.

As it got hotter outside, we went back into the hangars where some beautifully restored WW-II era aircraft were on display. Among them a B-29 and this B24 Liberator.

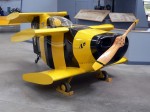
Also inside was one of the strangest looking aircraft I had ever seen. It’s the Bumble Bee, the worlds smallest piloted aircraft. It has a wingspan of 5′ 6″ and and overall length of 8′ 10″.

We really enjoyed our visit here and would even consider going back again in the future as there were many displays that we didn’t have time to see nor were we able to take the optional trip to the “Boneyard.”

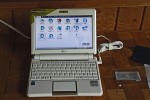
I’ve been following the ASUS Eee PC, ultra portable laptop since it came out. but I felt the original 7″ screen was a little small and the storage capacity limited. That changed when they came out with the next model. I finally gave in and ordered a Eee PC 901 on August 20th. I got the 1.6GHz 20GB, Linux model and it arrived on Tuesday.

My first impressions are quite favorable. It’s fast and lightweight. The 9.8″ screen is bright and very readable. The Linux distro it uses is a version of Xandros and it is very complete. I have had no real problems with any of the numerous software packages that are pre-installed. It is easy to set up and use.

Best of all, it boots up like lightning – maybe 30 seconds total. Not quite instant on, but close. It is very practical to keep it handy and turn it on just to check the weather or news and then flip it off again. No agonizing wait for boot up or shut down.

Some of the features of this machine I really like are:

  • 3 USB 2.0 ports, Ethernet port and an SDHC card slot that allows up to 16GB of additional, removable, storage.
  • Built-in Wi-Fi and Bluetooth
  • 20 GB solid state HD (no shock and vibration worries) and 1GB RAM
  • Skype pre-installed with a built-in Web Cam for video calls
  • About the size of a hardbound book – 2.2 pounds with battery.

There were only a few problems:

  • I had trouble getting the Wi-Fi to work. Then I found out I had set up the wrong type of encryption for my network. Once that was fixed all was well.
  • I had a lot of trouble with the “tap” feature of the touch pad. I finally had to disable that since I was forever clicking when I didn’t want to. An external mouse is still a nice addition. The touch pad is okay for a quick check of email or a web site but I’m much slower using that compared to a mouse.
  • Using Thunderbird for email and USENET. It just does not have all the features I want. Maybe a later version will fix some of its problems but right now it is a bit of a struggle. On the other hand, it does work with no real bugs that I have found.
  • I haven’t found a version of TrueCrypt that can run in the GUI on this machine. The command line version is too cumbersome for me. This is minor but a nuisance as I worry about keeping unencrypted private info on a laptop.
  • the shutdown process hangs if you have Wi-Fi enabled. I think this is a known bug and there will probably be a fix one day. The work-around is to either be sure to turn off Wi-Fi before shutting down or to use the “emergency shutdown” (manual power switch).

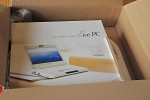
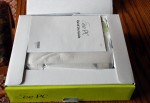
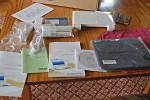
Here are some pictures of the unboxing. Click on the thumbnails for a larger image.

After opening the outer boxWhen I opened the outer box I was dismayed that Amazon had not filled all the empty space with plastic air bags as is there usual procedure. Still, everything looked to be in good shape.

Inside the boxHere is how the inside of the box looked. Very well protected and everything intact. I guess the lack of padding in the outer box was not a problem.

ContentsEverything from the box spread out on the table. The battery is not installed in the PC so the back edge looks a little strange.

Eee PC screen and keyboard

This is a shot of the screen and keyboard after I booted it up for the first time. Worked like a champ – looked cool.

In summary, I would recommend the Eee PC to anyone who wants a light, simple machine for email, web surfing and basic computing while traveling. You should not be afraid of Linux in this application. It works well and is easy to get used to. ASUS has put a lot of effort into making the interface as user friendly as possible while still retaining the parts that makes geeks love Linux.

I should caution that my personal biases should be considered before anyone takes my recommendation too seriously. As they say, “YMMV”.

  • I’m not a fast typist and don’t mind the small keyboard.
  • Low weight and small size are highly important to me when traveling.
  • I’m looking for ways to wean myself of Windows and Microsoft.
  • I am a nut when it comes to cool gadgets.

A few weeks ago one of the podcasts I subscribe to (FLOSS Weekly) had a episode about a ray tracing program called POV-Ray. The people being interviewed in that podcast were so enthusiastic about their software that I decided to give it a try.

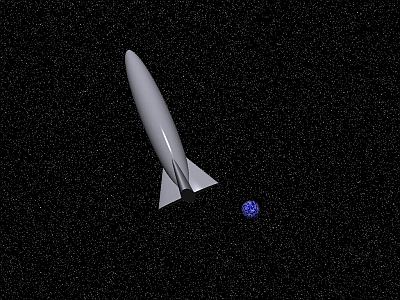
It’s a free, open source product and I found it has good documentation too. Anyway, I’ve been playing with it for a while, mostly going through the tutorial and doing the examples. Finally I decided to try something original and here is the result.

Rocket

This is a very simple image though I hope to embellish it as I learn more about the program and how to use it.

The great thing about POV-Ray (at least to me) is that it is all done with software and written in a “scene description language.” It’s very much like programming in any other language except that the output is rendered into an image. I’ve tried creating images from scratch using Photoshop or other image editors but I never could get the hang of that. With this I can work in a way I am familiar with.

All the images created are 3-dimensional and it’s easy to change the viewpoint and lighting to get the best looking results. Also there are many pre-defined elements such as the background stars and the planet’s sky in my little example.

Anyway, if any of you are interested, you can download the program for most OS’s (Windows, Mac, Linux and others) and just play around with it. It comes with a lot of pre-coded examples that you can have fun with. If you want to listen to the podcast that got me hooked you can download it here. It is an MP3 about 32MB in size.

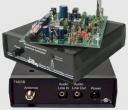
FM25B Most of you know what Internet radio is. For those who don’t, it’s simply radio programming transmitted over the Internet as a stream (rather than a download like a podcast). Usually, but not always, the programming is associated with a normal broadcasting station and mirrors their on-air content.

The benefits of Internet radio are several:

  • Variety: You can listen to programming outside of your normal radio range. I regularly listen to stations in Los Angeles, Duluth, Boston, Houston and Colorado Springs. There are even Internet Radio stations in countries all around the world.
  • Time Shifting: For network or syndicated programming you can listen at different times due to time-zone shifting or station schedules. Often on weekends I don’t get up in time for the NPR Weekend Edition but I can catch it from stations in the Mountain or Pacific time zones.
  • Quality: Many stations stream high quality audio – much better than you get on an AM signal and often better than a distant FM signal.
  • Freedom: If you live in an area where your local stations all have crappy programming you can find something more to your liking somewhere else. Since our local public radio stations imploded recently, I’ve been getting my radio fix from a wide range of stations. There is an all folk music station I listen to in Boston, a station that carries Old Time Radio programs on the weekend, and several stations with unique local programming. I’m still looking for one that streams Dr. Demento!

Of course the downside is you can’t do this in the car. You are not, however, tied to your computer to listen to Internet radio. With a low-powered FM stereo transmitter (I purchased the FM25B kit from Ramsey Electronics) you can listen anywhere in your house. Ramsey and other manufacturers have a number of models in a wide price range.

With the FM25B connected to my PC and using a simple wire antenna, not only can I listen to Internet radio anywhere in the house, but in the garage, out on the deck or when out working in the yard.

It’s perfectly legal within FCC Part 15 regulations though if you get interference complaints you must change your operation to eliminate them.

One of my pet peeves is that nowadays hardware and software manufacturers don’t provide paper manuals with their products. I’m the sort of person who likes to flip through the pages to find what I need to know, not load up some .pdf file and scroll through it. A while back I found a web site about binding your own books. Then, when I got the new printer, I realized I could easily take those inconvenient pdfs and turn them into real manuals.

I made a clamp similar to the one described in the web site, though I used some scraps of aluminum angle that I had lying around rather than wood. So far I’ve bound three different manuals with varying degrees of success.
Books
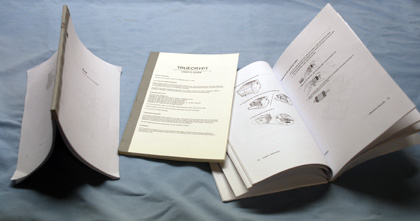
I didn’t have paper the proper weight and size for a regular cover so I just used a strip of gaffer’s tape to cover the spine.

I’ve had a few problems but all the manuals are serviceable. First, it’s important to spread the glue evenly, otherwise it leaves bumps and irregularities on the spine. It’s possible to smooth this after the glue drys but it’s an extra step.

The second problem is having the glue soak in too far near the ends of the spine. This can be dealt with by not applying glue to that last 1/8 inch or so.

My third problem comes from the need to dampen the spine before applying the Gorilla Glue. For some types of paper this causes the spine to develop a wavy distortion. I haven’t found a cure for this yet but I think it may just require care in how much water I use.

All-in-all this has been a fun project an I’m please to have manuals I can thumb through in the fashion I’m used to. An added benefit is that when a manual gets worn, torn or tattered, I can just make a new one.

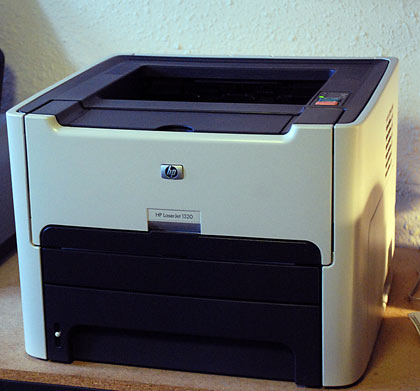
After going for a while without a laser printer, I finally broke down and bought an HP-LaserJet 1320. It has almost all of the features of the old HP4P with around four times the speed and built-in double-sided printing.

HP-1320

It has nearly the same footprint as the the old 4P but is approximately twice as tall. It seems quite a bit quieter though, obviously, I can’t compare them directly.

For the last day or so, I have been testing out many of the features of this new toy. I like the ability to print manuals (including its own) in “booklet” mode. This allows a 172 page manual to be printed on 43 letter sized sheets in proper order for binding. Now I’m learning how to bind these manuals (more on that in another post).

It will be interesting in the long run to see if this printer has anywhere near the reliability as the old one. On an interesting note, this one cost less that 40% of what the old one cost 13 years ago.

Technology marches on.

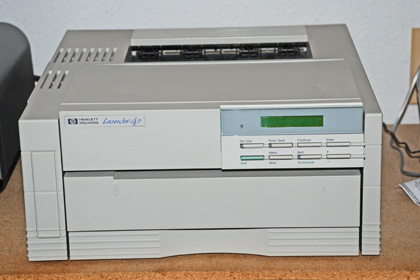
Today my faithful old HP4P LaserJet printer finally gave up the ghost after 13 years of steady use.

HP4P

This printer has outlived five different computers, going back to the days of Windows 3.1 ! For the last few years I’ve been expecting it to die but nothing seemed to phase it. Finally, while printing out a copy of my son Steev’s novel today, it sucumbed to severe paper jamming and finally the feed mechanism froze up completely. I think I have to find out how to give it a Viking funeral.

Now I am starting to look for a replacement. I doubt I can find a printer that will last for another 13 years – they just don’t make them like they used to. Anyone want to recommend a similar printer that can come close to the service I got from this warhorse?

RIP old pal.

For quite a while I’ve been interested in Linux as an alternative to Windows. But, like many people, I’m not quite ready to make a blind leap to another OS just yet. For one thing, the Linux world is considerably different than Windows and the the learning curve is steep in some areas. I needed to start out with some training wheels.

On Monday Jan and I were out doing errands and I wanted to go to a local used computer and e-waste recycling place called Midwest Computer Brokers (MCBIA). I found they had some great deals on relatively new PC’s. I ended up buying this little gem for a song.

PC

I got home and checked it out to make sure it was working okay. Then I booted with an Ubuntu live CD to make sure the hardware was compatible (which it was).

Today, I installed software. First I put Windows on it, then I installed Ubuntu on the hard drive. In less than 3 hours I had a working dual boot system. In fact Ubuntu installed easier than Windows. With Windows I had to go searching for additional drivers while Linux had everything needed already in the installer.

So now I’m off on the big adventure. I’ll recommend Ubuntu to anyone who has an old PC and wants to play with Linux. Download Ubuntu or order one of their free CD’s (free shipping too).

Fun With DSL

Jan and I are spending the weekend in Wisconsin, visiting friends. Part of that time I’m helping one of them make the jump from dialup to DSL. It took quite a while today to get all the stuff installed, both hardware and software. After a few rounds with confusing instructions, I got her email configured for the new address and all worked fine.

Then I went to Steve Gibson’s GRC site and ran his “Shields Up” network security test program. This revealed quite a few holes with the DSL connection. They were probably there with the dial up but the exposure time is shorter than with the always-on DSL.

Because of this I decided to set up a Linksys router to act as a firewall. Good idea, but the devil is in the details. So far I can’t get the router to play nice with the DSL modem. To complicate matters, Linksys now only includes the manual as a PDF file! I really like paper manuals for this sort of work.

But I’m making progress. With luck I should have it working tomorrow – knock on wood.